 APP
APP
话不多说,记录一下这个框架的使用~小程序使用轻量、可靠的小程序 UI 组件库 vant-weapp
Github源码:https://github.com/youzan/vant-weapp
中文文档:https://youzan.github.io/vant-weapp/#/intro
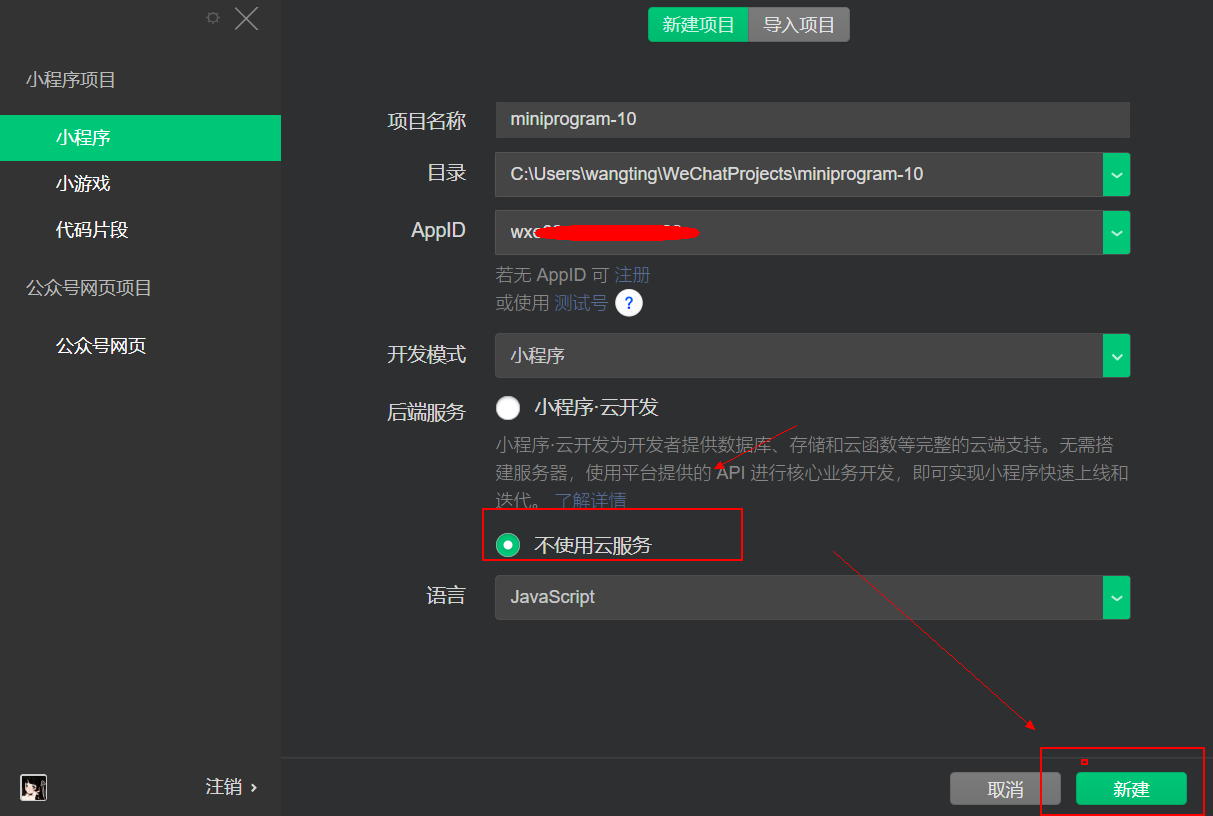
1:打开微信开发者工具,填写自己的appid和项目名称,选择不使用云服务,新建一个项目。
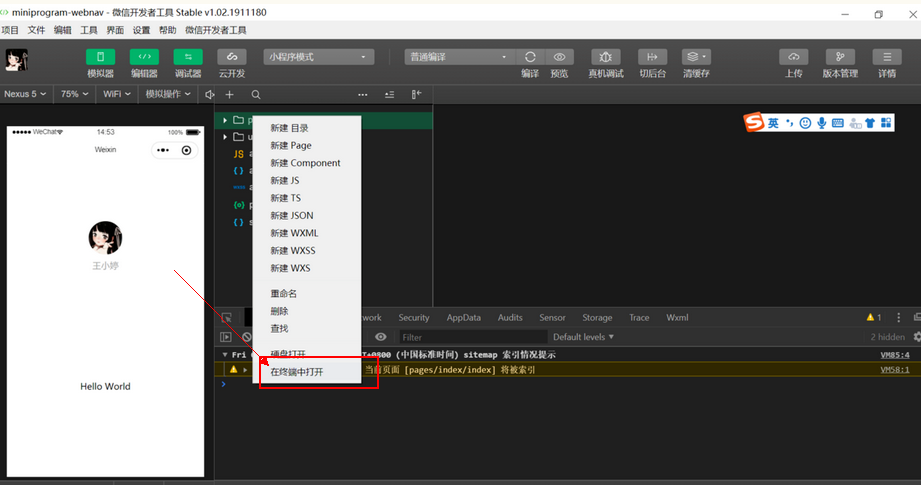
2:右击在选择在终端打开
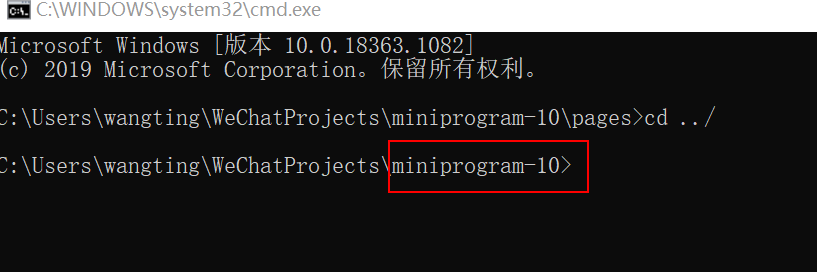
进入项目的根目录底下,注意,一定要进入根目录哦,使用cd ../返回上一级目录~
3:小程序已经支持使用 npm 安装第三方包,
这里通过 npm 安装
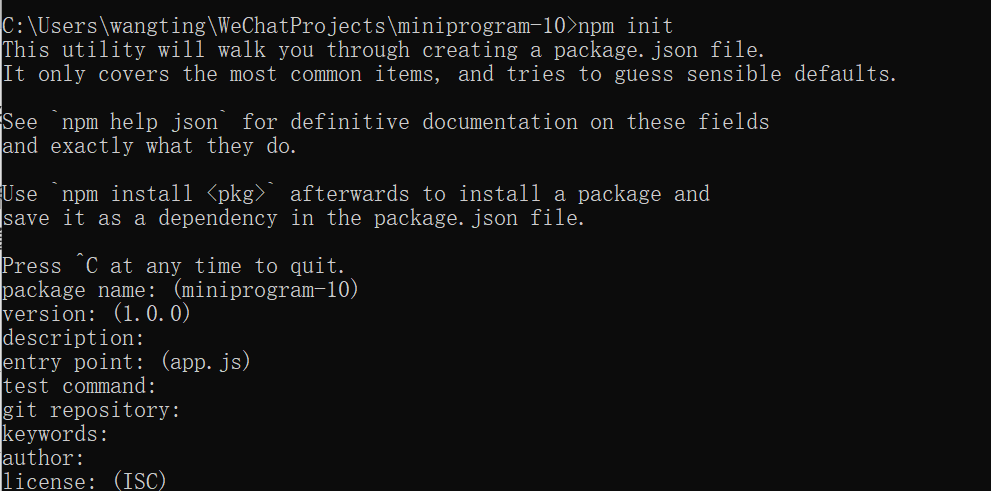
1、第一步:npm init
2、第二步:npm install --production
3、第三步: npm i @vant/weapp -S --production
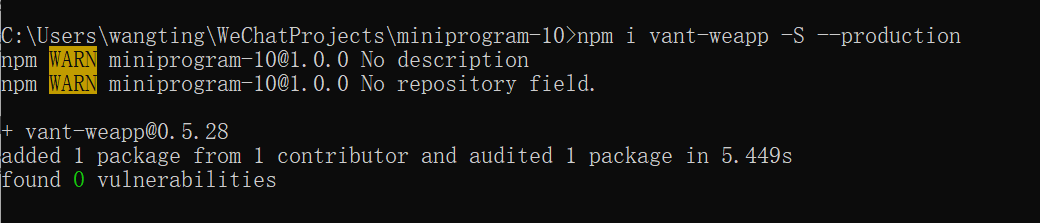
或者 npm i vant-weapp -S --production

这里需要注意一下
npm i vant-weapp -S --production或者npm i @vant/weapp -S --production
引入的区别
使用npm i vant-weapp安装的时候,到时候在在app.json或index.json中引入组件,需要使用这样的路径
{
  "usingComponents": {
    "van-button": "../../miniprogram_npm/vant-weapp/button/index"
  }
}
使用npm i @vant/weapp安装的时候,到时候在在app.json或index.json中引入组件,需要使用这样的路径(推荐,因为这个可以直接抄文档,不需要改变引入路径的~)
{
"usingComponents": {
  "van-button": "@vant/weapp/button/index"
}
}
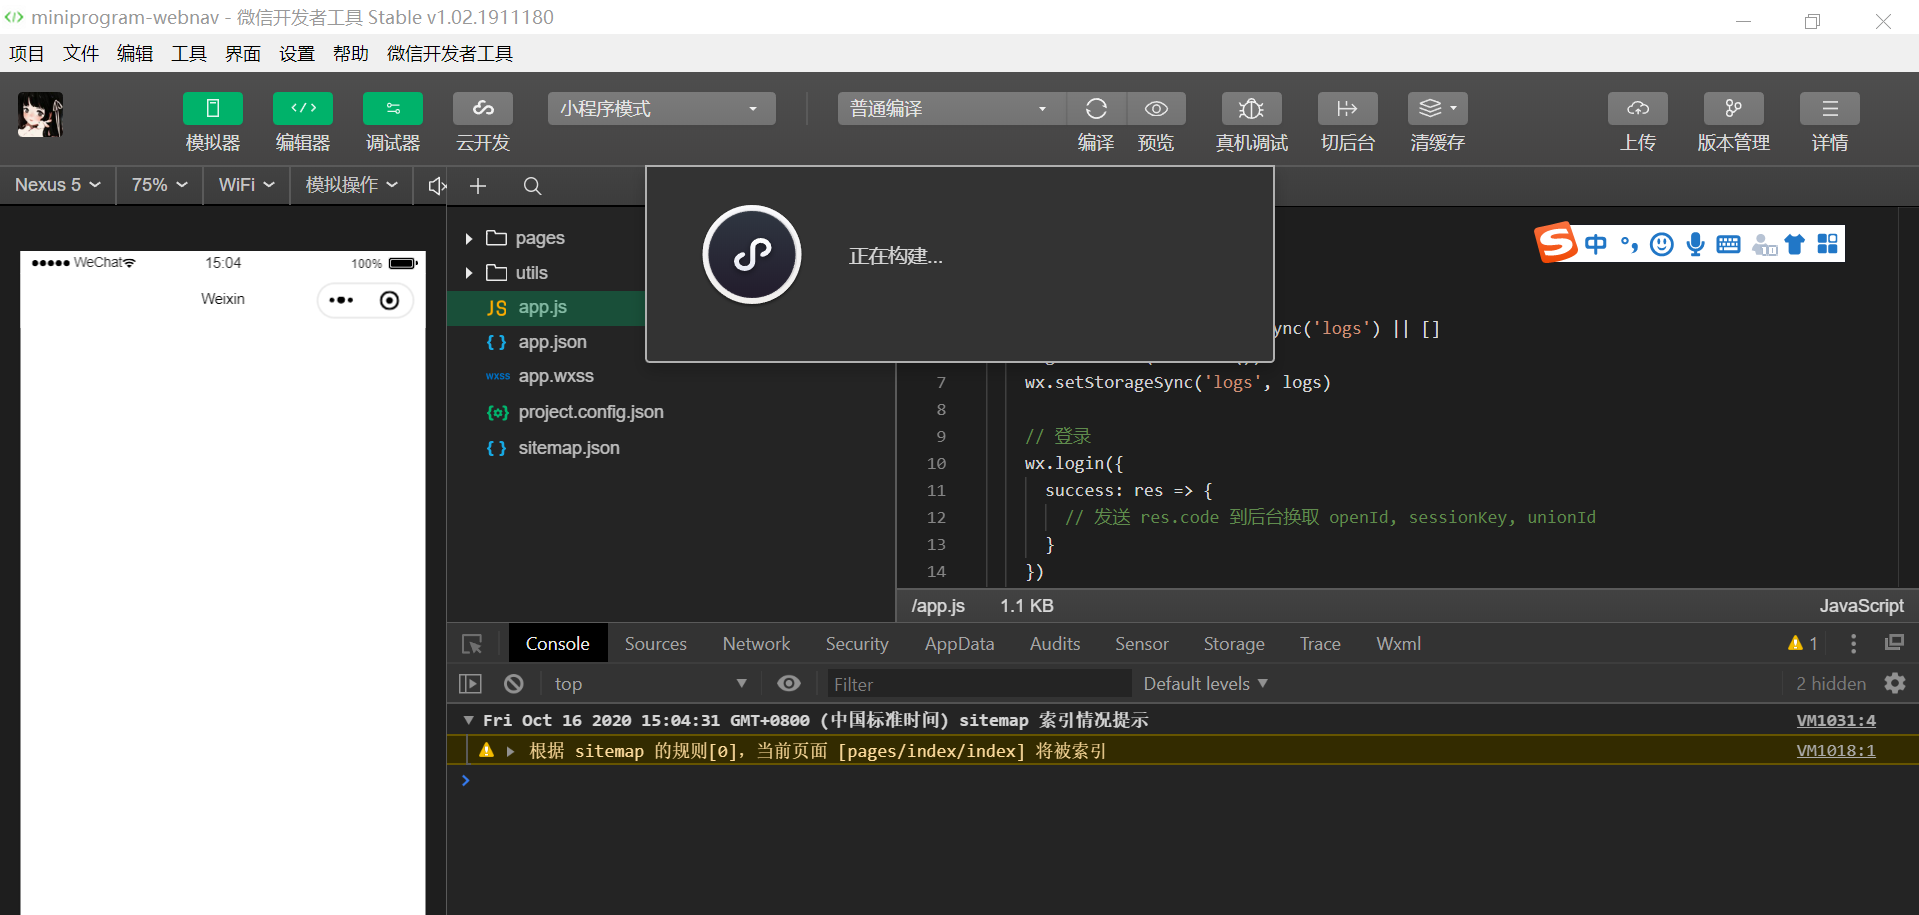
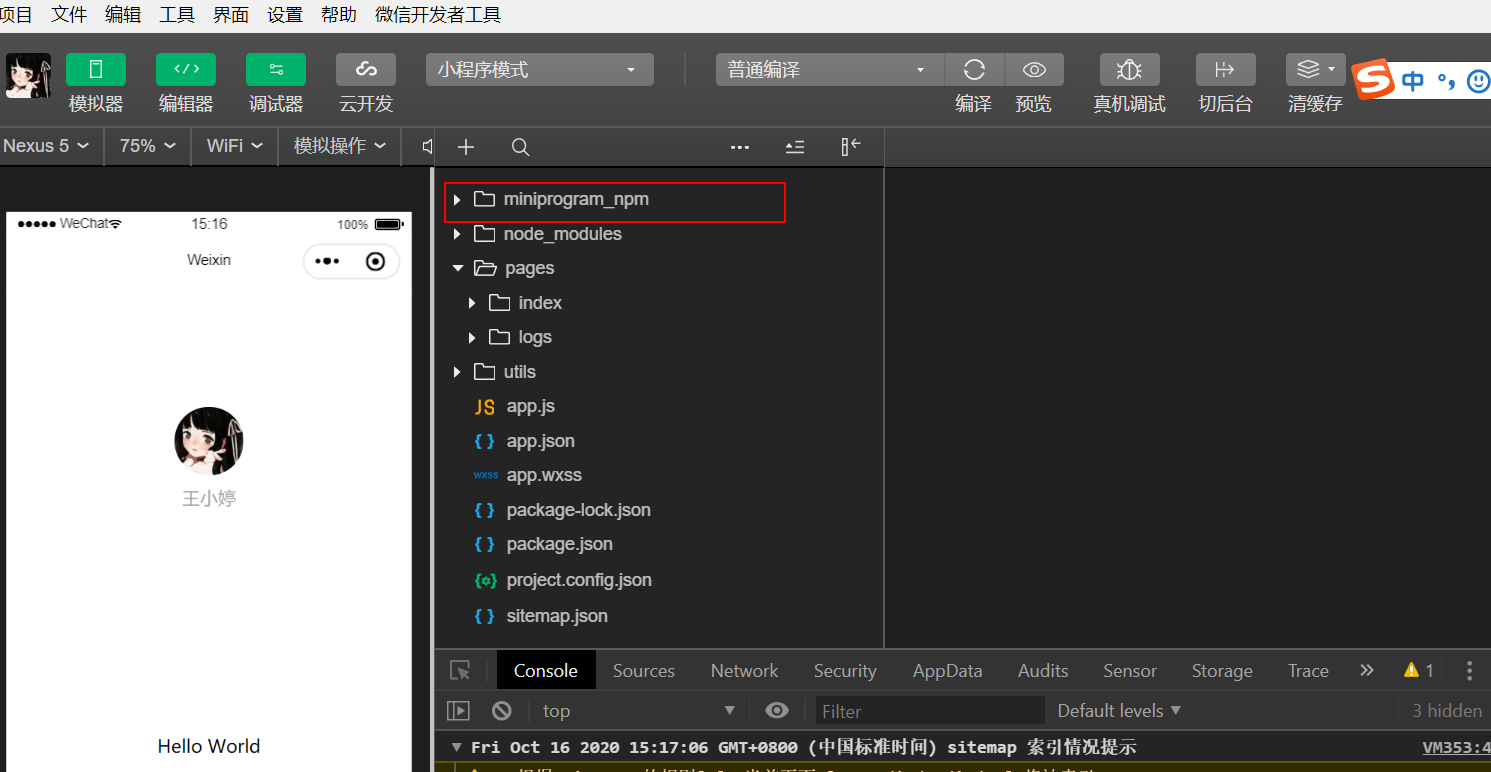
4:在微信开发工具执行npm 构建,点击工具里面,构建npm
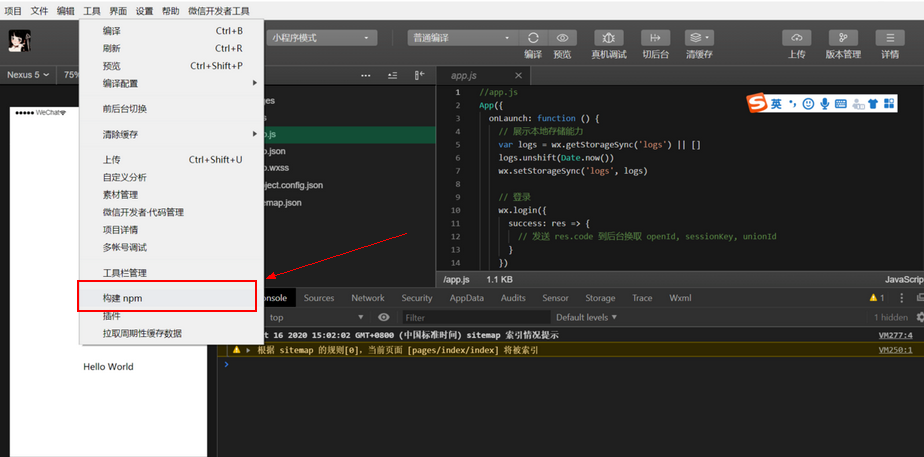
构建过程需要等待一会儿,不要捉急
构建完会生成一个miniprogram_npm文件夹
如果构建完如果编译报错,再构建一次就好了
话不多说,来看看小程序vant-weapp的日期选择器的使用
日期选择器文档参照一下
https://youzan.github.io/vant-weapp/#/datetime-picker
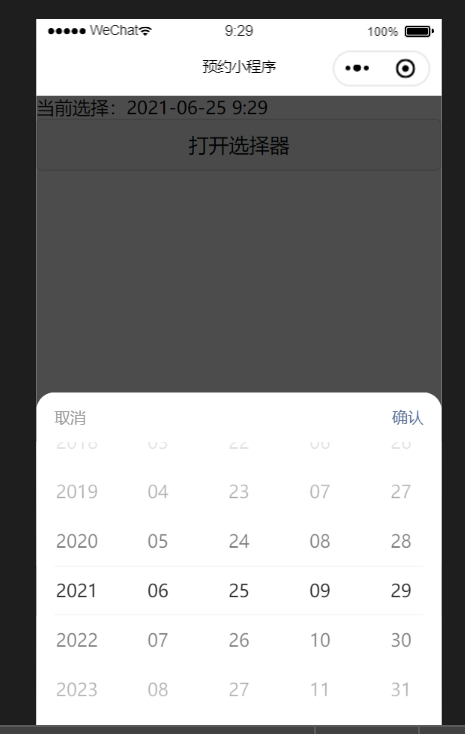
5:使用DatetimePicker 时间选择组件
选择日期格式如下:
2021-06-25 9:29
参考代码:
wxml
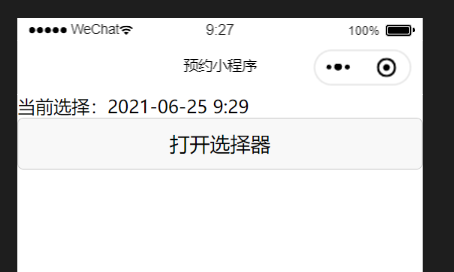
<view>当前选择:{{currentChoose}}</view>
<button bind:tap="openPicker">打开选择器</button>
<van-action-sheet show="{{ show }}" bind:close="onClose" bind:getuserinfo="onGetUserInfo">
  <van-datetime-picker type="datetime" value="{{ currentDate }}" min-date="{{ minDate }}" max-date="{{ maxDate }}" bind:cancel="onCancel"
    bind:confirm="onConfirm"  bind:change="onChange" />
</van-action-sheet>
js
const app = getApp()
Page({
  data: {
    minHour: 0,
    maxHour: 24,
    minDate: new Date(1990,1,1).getTime(),
    maxDate: new Date(2099, 12, 31).getTime(),
    currentDate: new Date().getTime(),
    show: false,
    currentChoose: ''
  },
  openPicker() {
    this.setData({ show: true })
  },
  onConfirm(e) {
    this.setData({ show: false, currentChoose: this.formatDate(new Date(e.detail)) })
  },
  onClose() {
    this.setData({ show: false })
  },
  onCancel() {
    this.setData({ show: false })
  },
  formatDate(date) {
    let taskStartTime
    if (date.getMonth() < 9) {
      taskStartTime = date.getFullYear() + "-0" + (date.getMonth() + 1) + "-"
    } else {
      taskStartTime = date.getFullYear() + "-" + (date.getMonth() + 1) + "-"
    }
    if (date.getDate() < 10) {
      taskStartTime += "0" + date.getDate()
    } else {
      taskStartTime += date.getDate()
    }
    taskStartTime += " " + date.getHours() + ":" + date.getMinutes()
    this.setData({
      taskStartTime: taskStartTime,
    })
    return taskStartTime;
  },
})
json
{
  "usingComponents": {
    "van-datetime-picker": "@vant/weapp/datetime-picker/index",
    "van-action-sheet": "@vant/weapp/action-sheet/index"
  }
}
结果:
点击打开选择器的时候
日期选择器的组件会从底部弹框弹出
可以选择自己想要的时间,然后将时间显示在页面上
或者传递给后端都可以
根据自己的需求进行修改~~~
© 著作权归作者所有,转载或内容合作请联系作者
本文摘自 :https://blog.51cto.com/u
