接着Android自定义控件(二)---实战篇的讲解,这篇我们来详细讲一下测量(onMeasure)和绘制(onDraw)这两个方法
首先,我们来看测量(onMeasure)方法,在这个方法里,我们主要是设置控件的宽高,widthMeasureSpec、heightMeasureSpec这两个参数已经在基础篇讲解了,不过多赘述Android自定义控件(一)---基础篇
package com.example.mytextview;

//import javax.swing.text.View;
import android.content.Context;
import android.content.res.TypedArray;
import android.graphics.Canvas;
import android.graphics.Color;
import android.graphics.Paint;
import android.graphics.Rect;
import android.util.AttributeSet;
import android.view.View;

import androidx.annotation.Nullable;

public class mTextView extends View {
    //1、设置自定义属性变量
    private int mTextSize = 16;
    private int mTextColor = Color.RED;
    private String mText;

    //设置文字画笔
    private Paint textPaint;

    public mTextView(Context context) {
        this(context,null);
    }

    public mTextView(Context context, @Nullable AttributeSet attrs) {
        this(context, attrs,0);
    }

    public mTextView(Context context, @Nullable AttributeSet attrs, int defStyleAttr) {
        super(context, attrs, defStyleAttr);

        //2、获取装有自定义属性值的数值
        TypedArray typedArray = context.obtainStyledAttributes(attrs, R.styleable.mTextView);
        //3、精确获取自定义属性值
        mTextSize = typedArray.getDimensionPixelSize(R.styleable.mTextView_mTextSize,mTextSize);//源码用的这个方法,参照 TextView
        mTextColor = typedArray.getColor(R.styleable.mTextView_mTextColor,mTextColor);
        mText = typedArray.getString(R.styleable.mTextView_mText);
        //4、回收 typedArray
        typedArray.recycle();

        initData();
    }

    private void initData() {
        textPaint = new Paint();
        //抗锯齿
        textPaint.setAntiAlias(true);
        //设置颜色
        textPaint.setColor(mTextColor);
        //设置字体大小
        textPaint.setTextSize(mTextSize);
    }

    //5、测量
    @Override
    protected void onMeasure(int widthMeasureSpec, int heightMeasureSpec) {
        super.onMeasure(widthMeasureSpec, heightMeasureSpec);
        //获取宽高
        int width = MeasureSpec.getSize(widthMeasureSpec);
        int height = MeasureSpec.getSize(heightMeasureSpec);
        //获取模式
        int widthMode = MeasureSpec.getMode(widthMeasureSpec);
        int heightMode = MeasureSpec.getMode(heightMeasureSpec);
        //判断 如果是 wrap_content 模式,则 布局宽高 与 字体大小和字体长度有关
        if(widthMode == MeasureSpec.AT_MOST){
            //设置文字边界
            Rect bounds = new Rect();
            //获取文字边界
            textPaint.getTextBounds(mText,0,mText.length(),bounds);
            //获取边界宽度  ===  获取文字宽度
            width = bounds.width();
        }
        if (heightMode == MeasureSpec.AT_MOST){
            //设置文字边界
            Rect bounds = new Rect();
            //获取文字边界
            textPaint.getTextBounds(mText,0,mText.length(),bounds);
            //获取边界高度  ===  获取文字高度
            height = bounds.height();
        }
        //最后设置宽高
        setMeasuredDimension(width,height);
    }

    //6、绘制
    @Override
    protected void onDraw(Canvas canvas) {
        super.onDraw(canvas);
    }
}
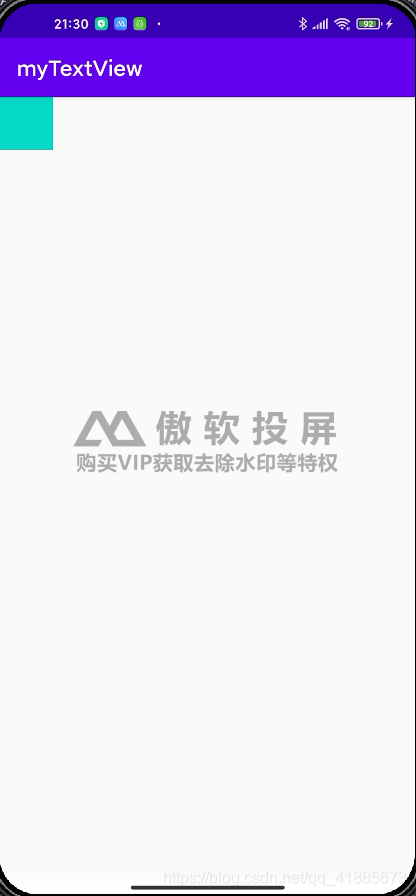
现在可以去运行一把了,可以看到一个方块,之所以没有汉字,是因为我们没有编写绘制(onDraw)方法,效果图如下:

在这里,我还想多说一句,那就是内边距(padding)和外边距(margin)对布局尺寸的影响
padding会使布局宽高增加,并且会继承布局的背景色,如果布局使用的是 match_parent 还会导致布局超出屏幕
margin会使布局宽高减少,并且不会继承布局的背景色
这点不做要求,你们碰见问题之后知道怎么解决接好了
本文摘自 :https://blog.51cto.com/u

